Introduction #
OneXtel is a leading CPaaS (Communication Platform as a Service) provider that offers seamless, end to end communication solutions. Our product offering includes channels like SMS, Voice, Whatsapp, Chatbot, RCS, and EMail services tailored for businesses of all sizes.
Configure OneXtel as a Private SSP (SMS Service Provider) #
To configure Onextel Connector on CleverTap, follow these steps:
Prerequisites :
1. You should have an active Onextel Aura account with associated API key(s).
2. Make sure the Entity ID and Sender Id(s) are added in the Onextel account.
Note: Kindly disable DND scrubbing while creating the API key to ensure complete submission from the connector to Onextel platform.
Note : To create a new account or incase of any queries and concerns related to Onextel account, kindly reach out to Onextel Support team at support@onextel.com.
Recommended :
Add your DLT approved templates in Aura account using the bulk upload option.
Step 1: Log in to your CleverTap account.
Step 2: Click on “Settings” from the left menu.

Step 3: Under “Settings”, click on “Channels” and select “SMS” from the dropdown.

Step 4: Click on + Add Provider.

Step 5: Under Add SMS provider, enter the details as mentioned below:

| Provider | Other(Generic) |
| Nickname | Sender ID (Mention your sender ID) |
| Callback URL | No changes |
| Request Type | Post |
| HTTP Endpoint | https://ctgwapi.onex-aura.com/postsms |
Step 6: Once the above details are filled, click on Headers.

Step 7: Enter the following details under the Headers section.
| Key | Value |
| apikey | SMS API key |
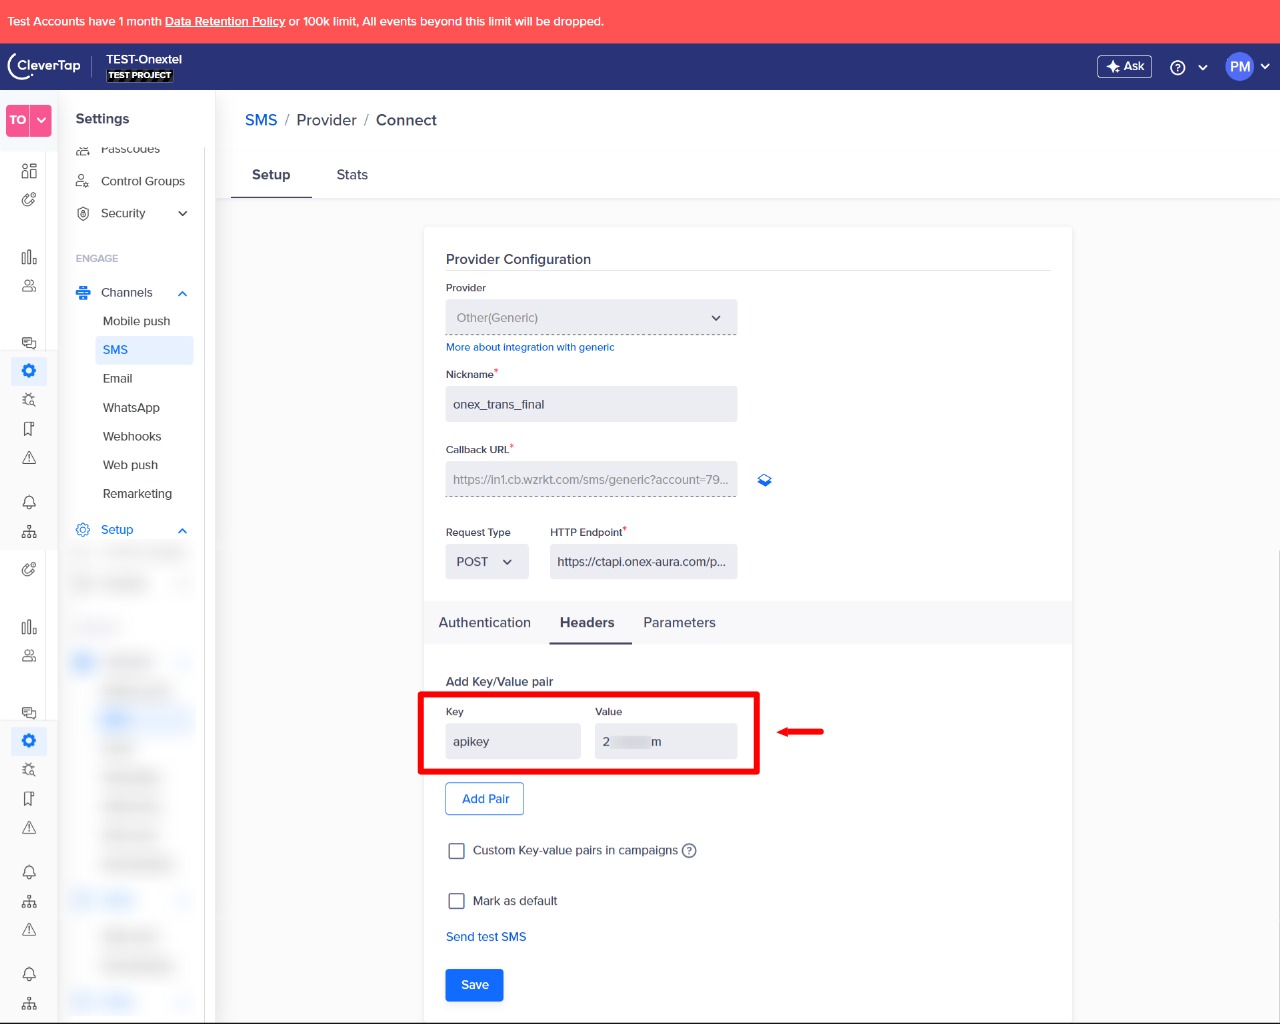
Once the Key and Value details are filled, kindly share the API key with the Onextel support team at support@onextel.com so that the given API key can be whitelisted for the CT configuration from our backend.
Step 8: Click on Parameters and select Type as JSON.

Step 9: Delete the curly braces and paste the below payload and replace the Sender Id and Entity Id:
{

  "listsms": [

    {

      "from": "SENDER_ID",

      "to": "$$To",

      "body": "$$Body",

      "entityid": "EntityID",

      "templateid": "$$TemplateID",

      "clientsmsid": "$$MessageID"

    }

  ]

}
Please refer to the table below for the detailed mapping of each field in the SMS request body:
| Field | Description | Example Value |
| Sender ID | DLT-approved Header ID/Sender ID | SENDER_ID |
| To | Recipient’s mobile number | $$To |
| Body | Message content | $$Body |
| Entity ID | Organization’s registered Entity ID | EntityID |
| Template ID | Template ID of the message content | $$TemplateID |
| Message ID | Unique ID for tracking the SMS message | $$MessageID |

Step 10: Once you have pasted the payload, select the Batch checkbox.

Step 11: Enter the below details under batch:
| Parameter name | Value |
| listsms | 1000 |

Step 12: Click on Save, a Send a test SMS pop-up box will appear.
Enter the Country Code, Mobile number, Template ID and Message.

Step 9: Once the details are entered, click on Send Test and Save.

Step 10: Once you receive the confirmation that the test SMS is sent, click on Save.

Now, the SMS settings have been configured successfully.
Delivery Notifications (Configuring Webhook): #
To configure the delivery notifications on your CleverTap account, follow the below mentioned steps :
Step 1 : Click on Settings → Channels → SMS → Click on the SMS setup that was just configured.

Step 2 : Copy the Callback URL and email it to support@onextel.com along with your TUC details, SMS api key while specifying that it is required for CleverTap integration.

#
Throttling setup #
After completing the configuration, set up campaign-level throttling to ensure smooth transmission of all requests from Clevertap to Onextel.
Step 1: Click on Setup from the left menu.

Step 2: Select Campaign Limits from the dropdown.

Step 3: Add SMS channel and set the throttle limit as 1,00,000.

Step 4: Click on Save.
