OneXtel is a leading CPaaS (Communication Platform as a Service) provider that offers seamless, end-to-end communication solutions. Our product offering includes channels like SMS, Voice, Whatsapp, Chatbot, RCS, and EMail services tailored for businesses of all sizes.
Install OneXTel SMS on Leadsquared #
To configure Onextel Connector on Leadsquared, follow these steps:
Prerequisites :
1. You should have an active Onextel Aura account with associated API key(s).
2. Make sure the Entity ID and Sender Id(s) are added in the Onextel account.
Note: Kindly disable DND scrubbing while creating the API key to ensure complete submission from the connector to Onextel platform.
Note : To create a new account or incase of any queries and concerns related to Onextel account, kindly reach out to Onextel Support team at support@onextel.com.
Recommended :
Add your DLT approved templates in Aura account using the bulk upload option.
tep 1: Log in to your LeadSquared account.
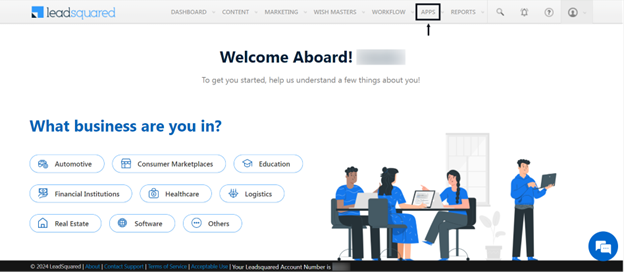
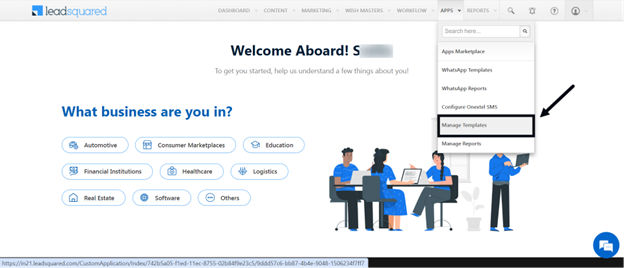
Step 2: Click on “APPS” in the top menu bar.
Step 3: Select “Apps Marketplace” from the dropdown.
Step 4: Search for “OneXtel” in the search box.
Step 5: Click “Install” under OneXtel SMS.
Configuration:
Here is the step-by-step guide to complete the configuration:
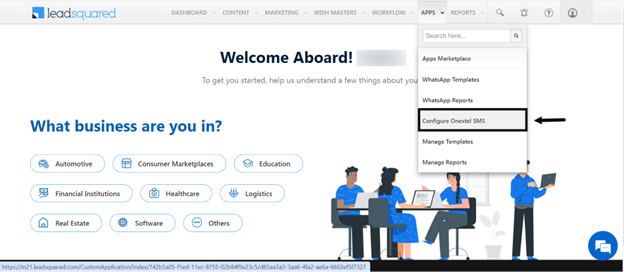
Step 1: Click on “APPS” in the top menu bar.
Step 2: Select “Configure OneXtel SMS” from the dropdown.
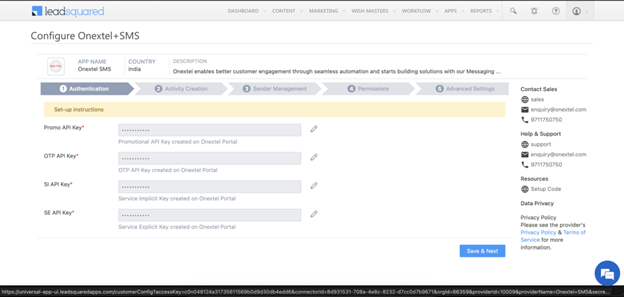
Step 3: The following page will appear.
Step 4: Authentication
Under “Authentication“, click on the edit icon and enter the API key generated on Aura (OneXtel’s SMS platform) for all SMS types and click on “Save & Next”.
Click here to learn how to generate an API key on Aura.
Step 5: Activity Creation
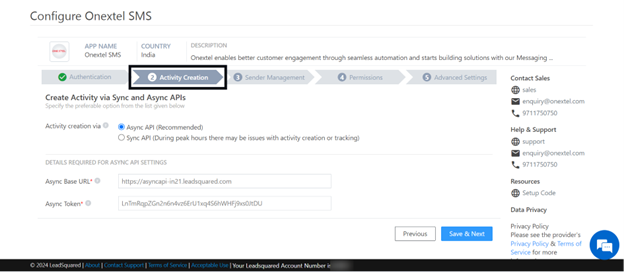
You can configure the creation of SMS activities using two methods:
Method 1- Async API: This is the recommended method. If you choose this, enter your LeadSquared account’s Async API URL and API Key.
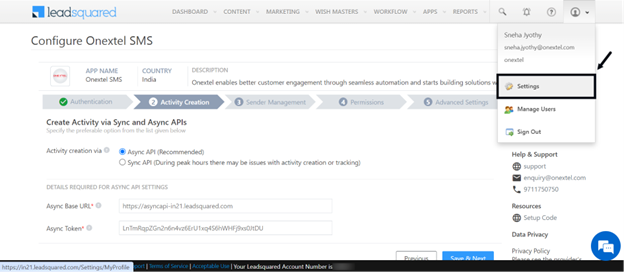
Follow the below steps to find the LeadSquared account’s Async API URL and API Key:
- Go to My Profile
- Click on Settings
- Click on API and Webhooks
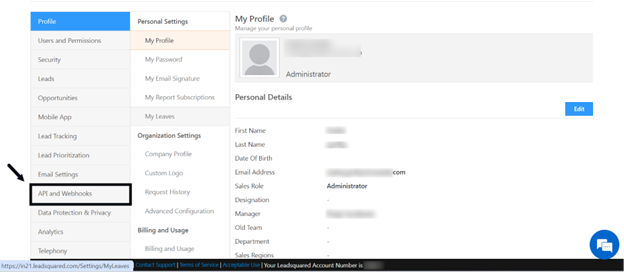
- Click on Async API
5. Select the base URL and the API token from here and enter it in the respective text boxes under “ Activity Creation”.
Once the details are added accordingly, click on “Save & Next”.
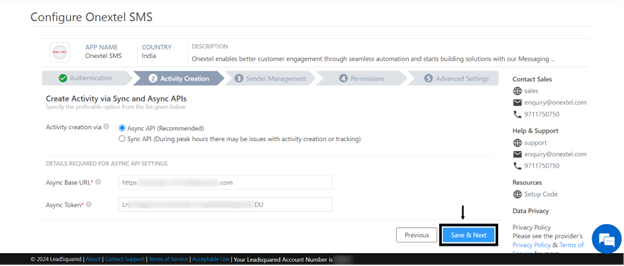
Note: Ensure that Async APIs are enabled on your LeadSquared account to utilize the Async method effectively.
Method 2 – Sync API: This method is selected by default. It allows for immediate posting of SMS activities against your lead. However, during peak hours or high server traffic, activity creation or tracking may encounter issues. To mitigate potential problems, we advise using the Async API method.
- Alternatively, select “Sync API”.
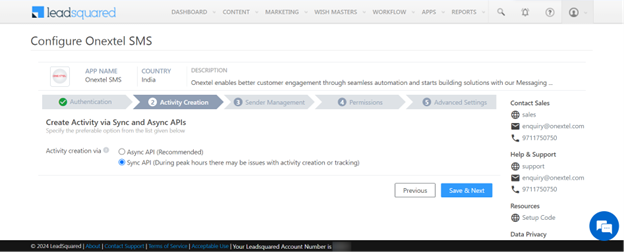
- Click on “Save & Next”.
Step 6: Sender Management
- Click on “+ Add New” to add a new sender ID.
- Fill in the required details and click “SAVE“.
- The sender IDs you have added are displayed below.

- After reviewing the sender IDs, click on “Save & Next“.

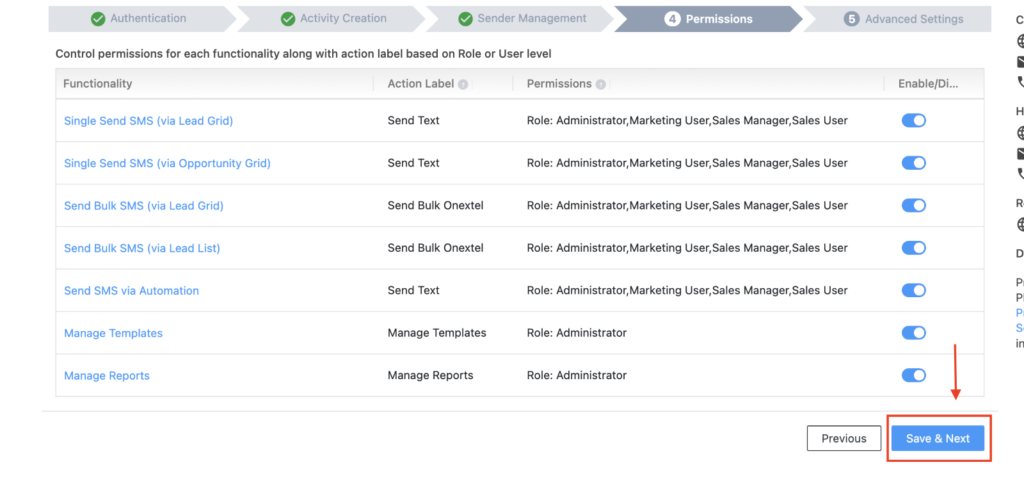
Step 7: Permissions
Enable the desired permissions from the specified actions.
After granting the permissions, click “Save & Next“.
Step 8: Advanced Settings
Make the necessary customizations to your SMS. A few customization options include:
- Compliance
- Date and time details
- Business hours
- Daily SMS details

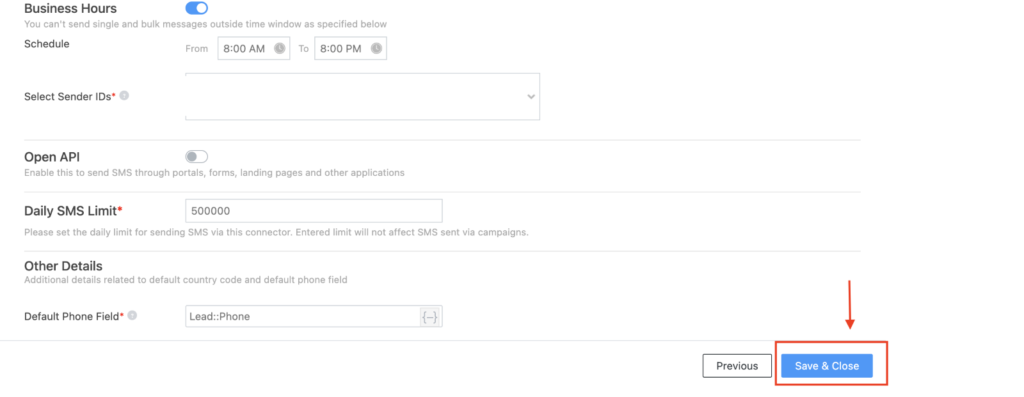
Once you have made the customizations, click on “Save & Close”
The configuration has been done successfully.
Manage Templates:
Once the OneXtel connector is set up, add the SMS templates you will use to message your leads.
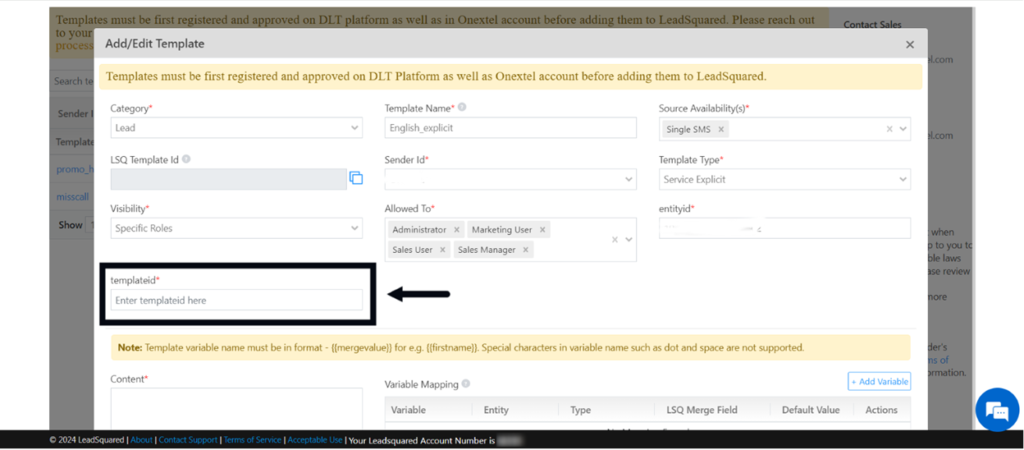
Templates must be registered and approved on the DLT platform and added in your account on Aura (OneXtel’s SMS platform) account before being added to LeadSquared.
Here is the step-by-step guide to adding templates on Leadsquared:
Step 1: Click on “APPS” in the top menu bar.
Step 2: Select “Manage Templates” from the dropdown.
Step 3: Click on “Add template” to add a new template.
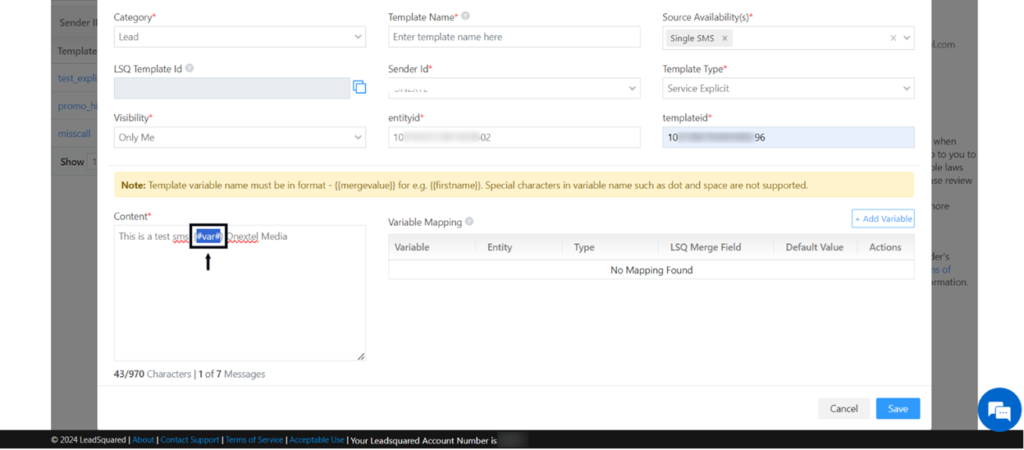
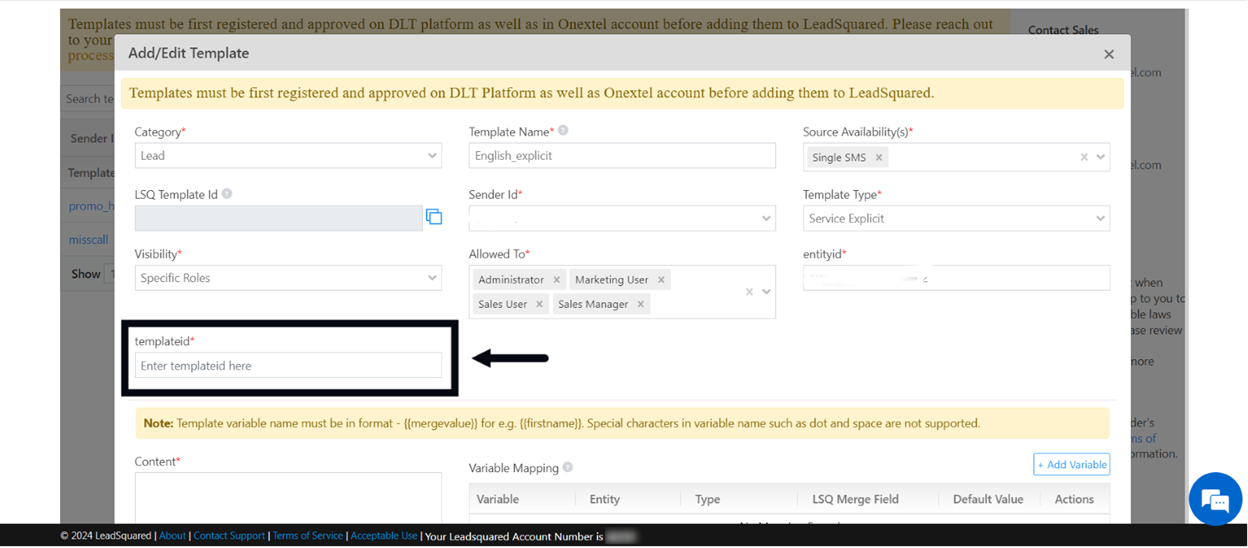
Step 4:The following pop-up appears prompting you to enter the details.
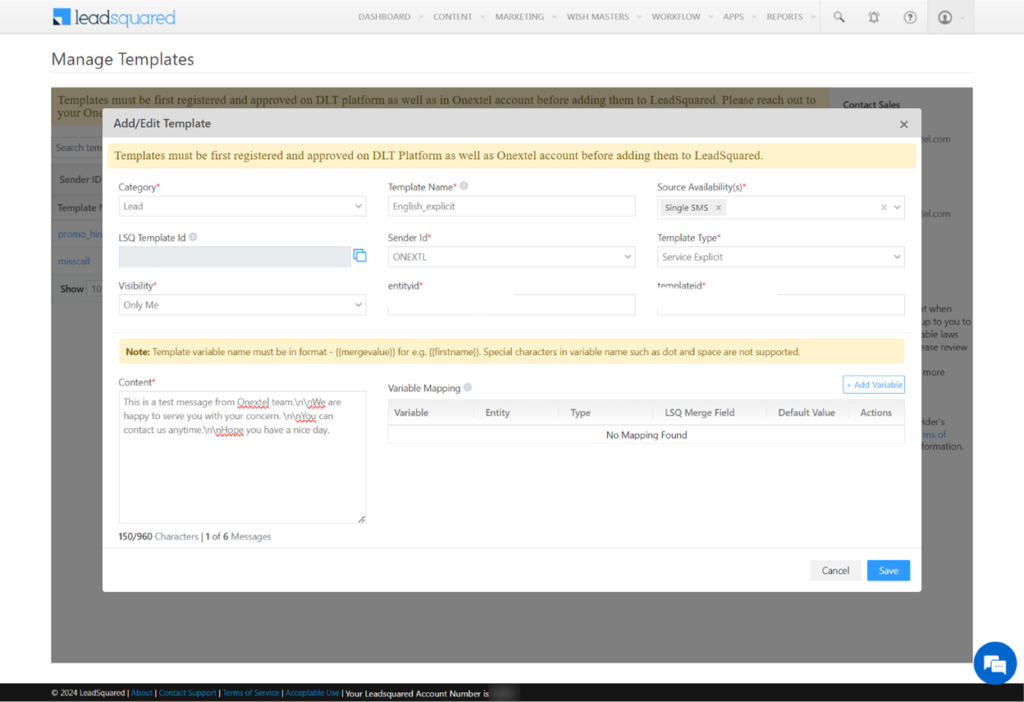
The following pop-up will appear, prompting you to enter the following details:
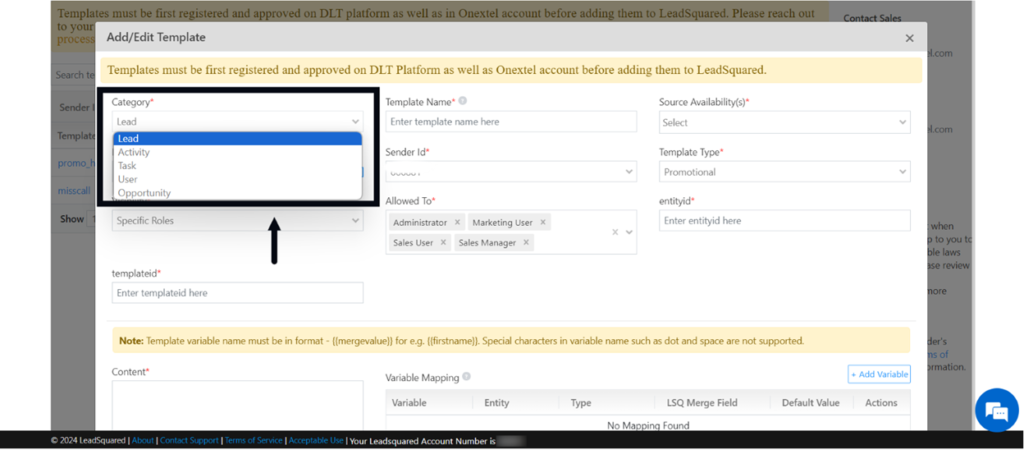
- Category: Choose the LeadSquared category type for the SMS template:
- Lead: For messages to leads (e.g., offers, promotions).
- Opportunity: For messages to opportunities (e.g., offers, promotions).
- Activity: For activity notifications (e.g., payments, document collections).
- Task: For task notifications (e.g., appointment reminders, follow-ups).
- User: For messages to users (e.g., reminders, company-wide announcements).
- Template Name: Provide a name for the template.
Source Availability: Select if the template should be available for Single SMS, Bulk SMS, and SMS through Automations. You must select at least one source.
SenderId: Enter your DLT-approved Sender ID.
Template Type: Choose the type of template:
- Transactional: For order confirmations, account creation confirmations, etc.
- Promotional: For ongoing offers, product launches, etc.
- Service Implicit: For OTPs, informational messages, bookings, etc. (non-marketing).
- Service Explicit: For discounts, updates, etc. (marketing).
Entity ID: Enter your organization’s Entity ID provided by DLT.
DLT Template ID: Enter the DLT-approved Template ID.
Content: Enter the DLT-approved template content/message here.
Add variable: If your templates include variables, click on “Add variable”.
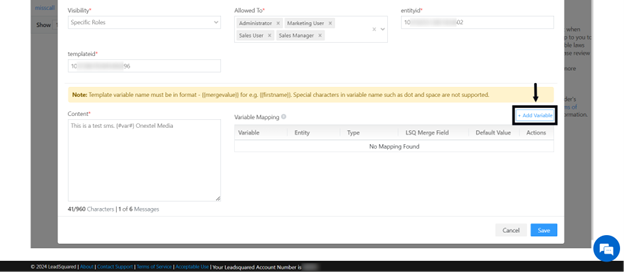
In the template content, replace the variable “ #var# ” with {VAR} i.e, {{VAR}}.
So the updated template will be – “This is a test sms. {{VAR}} Onextel Media” after replacing the variable.
Once the variable in the template has been updated, a table will appear for Variable Mapping.
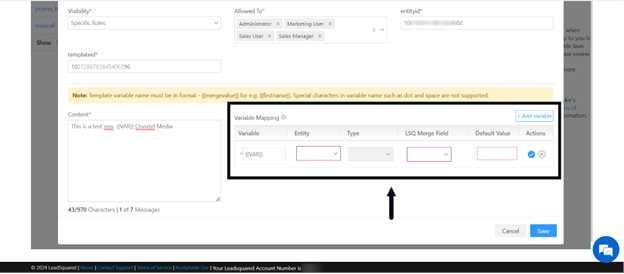
Enter the required details:
- Variable: Replace “ABC” with your desired variable.
- Entity: Specify who you are sending the SMS to.
- LSQ Merge Field: Select the category of the variable.
- Default: Provide the default value for the variable.
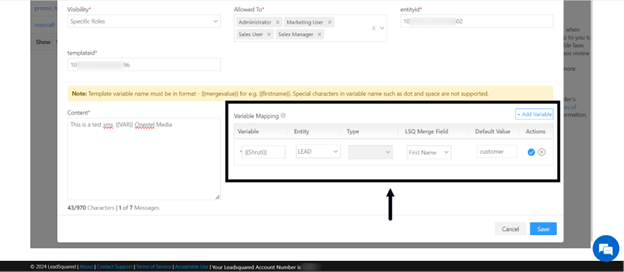
Once you have entered the above details, click the icon indicating the action is complete.
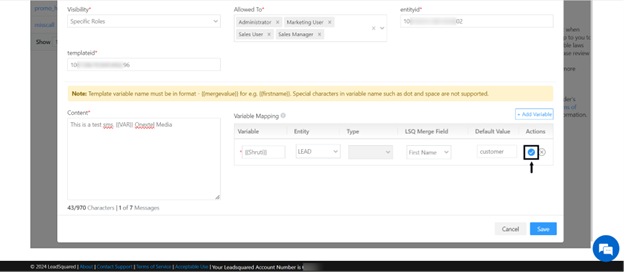
The variable will then reflect in the template.
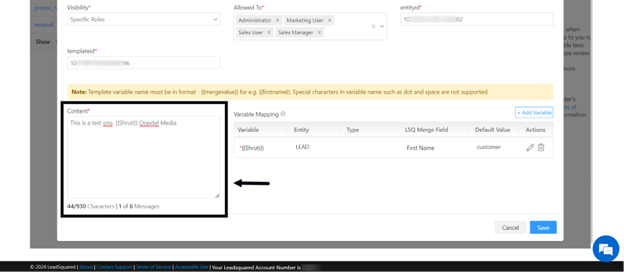
Once the variable is updated in the template content, click on “Save” to save the template.
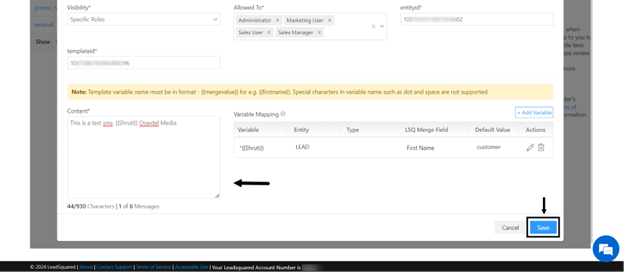
The template will have been added successfully.
Manage Reports:
You can access two types of reports on LeadSquared: Usage report and the Campaign report.
Usage Reports:
Usage reports provide details about the total number of one-to-one and bulk messages sent through the connector.
Here is the step-by-step guide to using the Usage reports section on LeadSquared.
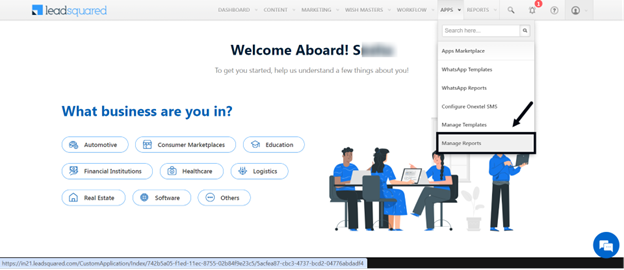
Step 1: Click on “APPS” in the top menu bar.
Step 2: Select “Manage Reports” from the dropdown.
Step 3: Select “Usage Reports”.
You can access the Usage Reports with specific data using the following filters and customizations.
- Templates: Filter reports based on the templates used for sending messages.
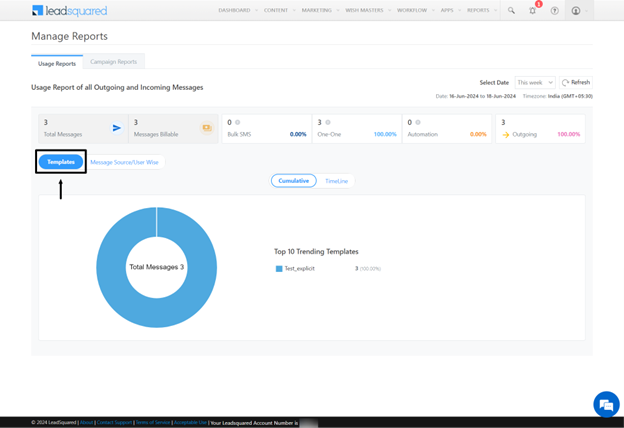
- Message Source/User Wise: Filter reports by message source (Automation, Bulk, and One-to-one messages).
- Select Date: Choose the time interval to view SMS logs, with a maximum range of up to 90 days in the past.
- Cumulative: Presents the report as a pie chart.
- Timeline: Displays the report as a bar graph.
Note:
- In pie charts, click on any part of the chart to view details in the section.
- In bar graphs, deleting elements updates the graph display accordingly.
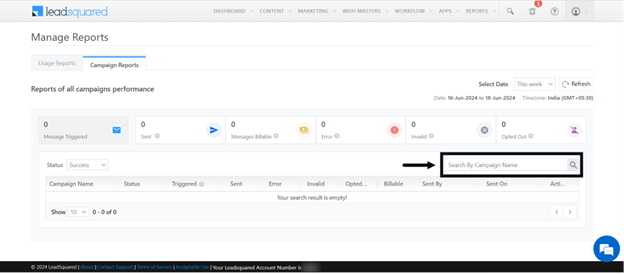
Campaign reports:
Campaign reports include logs of all bulk messages sent through the connector. This option is available only if the connector supports bulk messaging.
Here is the step-by-step guide to using the Usage reports section on LeadSquared.
Step 1: Click on “APPS” in the top menu bar.
Step 2: Select “Manage Reports” from the dropdown.
Step 3: Select “Campaign Reports”.

You can access the Campaign Reports for specific campaigns and date range.
- Select Date: Choose the time interval to view SMS logs, with a maximum range of up to 90 days in the past.
- Filter by the campaign Status (All, Success, Error, and Partial Error).

- Filter by searching for the name of a particular campaign.