| – Send messages with multiple variables. – Import recipient numbers and data from Excel sheets. – Reach up to 20 lakh recipients. (For a single-part SMS, you can send it to up to 20,00,000 recipients. For a two-part SMS, you can send it to up to 10,00,000 recipients, and so on.) |
Here is the step-by-step guide to sending a Dynamic SMS:
Step 1: After logging onto Aura, click on “ + New SMS” from the left panel as shown below.

Step 2: Click on “Dynamic SMS“.

The following screen will appear.

Step 3: Begin by downloading the sample file from the provided “Download Sample File” option.

Select the preferred format of the file and click on “Save File”.

Fill in all the necessary data in the respective columns of the Excel sheet.
Once data entry is complete, upload the Excel file onto the platform by selecting “Choose File.”

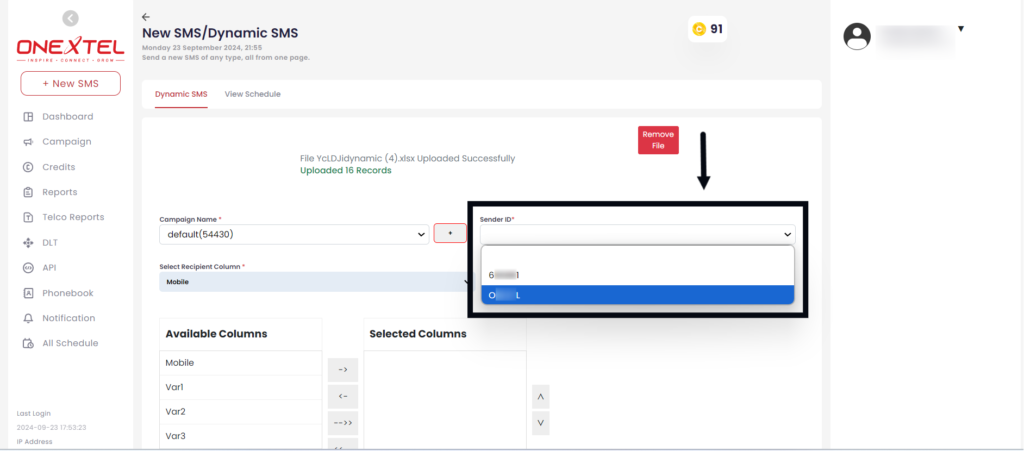
Step 4: Following the file upload, select the campaign name under which you intend to send the messages.

Step 5: Select the appropriate sender ID based on the type of SMS you are sending.
(To learn more about SMS types, refer to the link – )
Step 6: In the “Select Recipients” section, select the mobile column from the dropdown.
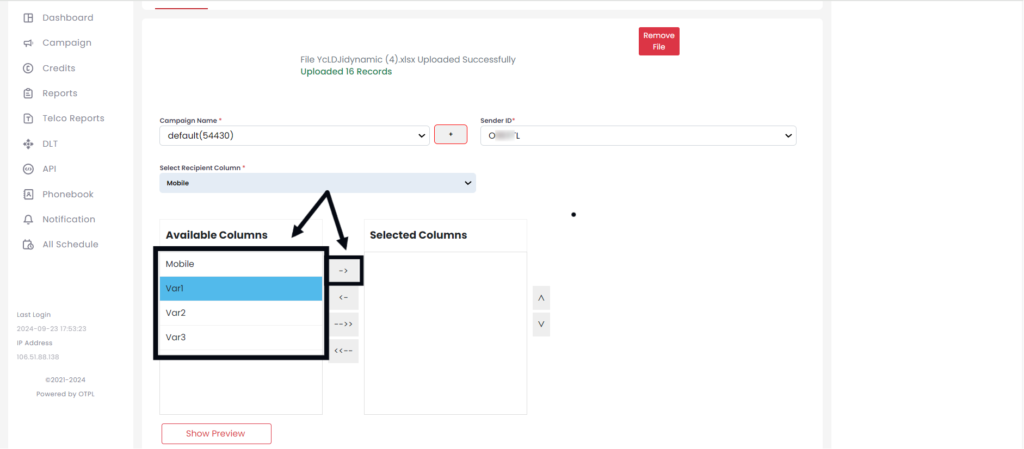
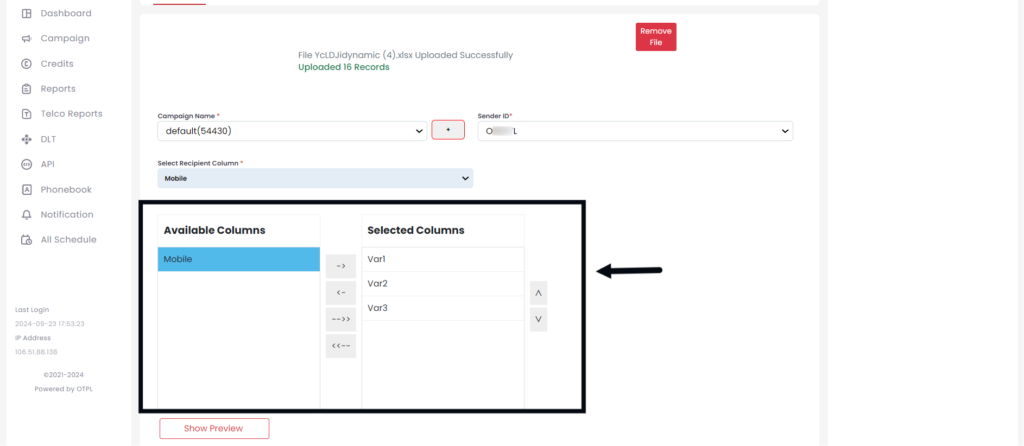
Step 7: After selecting the recipients column, choose the variables from the list of “Available Columns” and move them to the “Selected Columns” in the order of the variables arranged in your template using the arrows next to the variables.
Step 8:
Remove Duplicate Numbers: Automatically selected to eliminate duplicate entries (unselect if not needed).
Var with 30 Characters: Auto-selected to limit variables to 30 characters (unselect if not needed).
Remove Invalid Numbers: Automatically selected to ensure all recipient numbers are valid

Step 9: Click on “Insert Template” to enter the message content.

- A table will appear where you can start by selecting the template type under “Select Template Type.“

- Then, choose the “Select Template Filter” (search or dropdown) to find your desired template.

- Select the template from the ” Search Template” box.

- Once selected, the template ID and content will auto-fill in the corresponding sections.
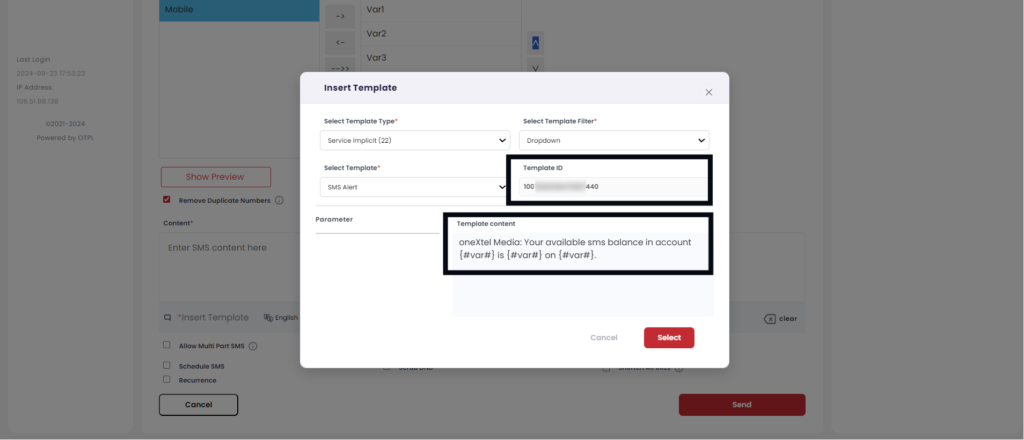
- After entering all details, click on “Select.”
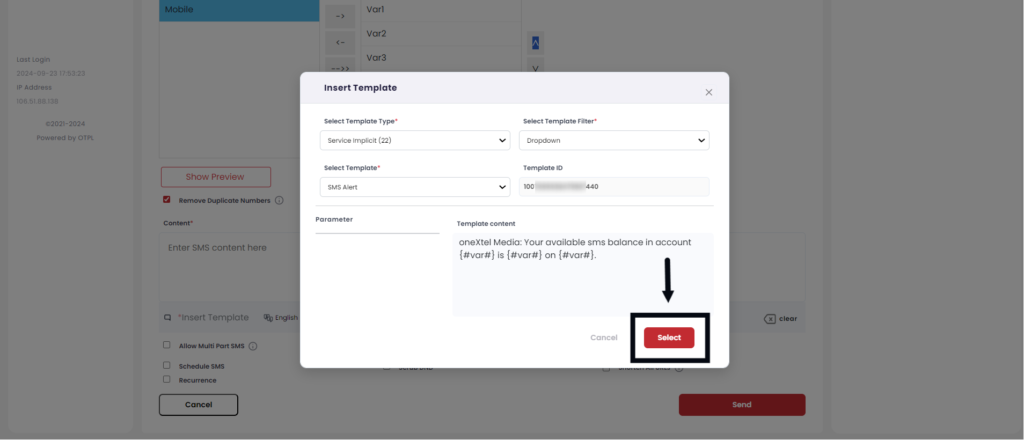
- The template content will be displayed under the “Content” section.

Step 10: Click “Show Preview” to see how the content will look with the variables.


Step 11: To include any URLs in your template, click on “Insert URL“.

- Select the domain.
- Enter the URL you wish to include in the SMS.
- Select “Get location” if you want to track the recipients’ location.
- Select “Insert URL”
If you want to clear the content, click on “Clear.”
Step 12: Customize your SMS campaigns with the following options:

- Allow multi-part: Messages over 160 characters will be split into multiple parts.
- Allow Unicode: Send SMS in various languages.
- Send as flash SMS: Appears on the recipient’s screen rather than in the inbox.
- Schedule SMS: Schedule SMS for future delivery. Click on “Schedule SMS” and select the date and time you want to send the SMS.
- Split into Multiple Campaigns: To split the campaign according to your needs, click on “Schedule SMS,” then “Split into Multiple Campaigns,” and enter the date, time, and SMS count for each split.
- Split into Multiple Campaigns: To split the campaign according to your needs, click on “Schedule SMS,” then “Split into Multiple Campaigns,” and enter the date, time, and SMS count for each split.
- Scrub DND: Excludes recipients who have opted for DND mode.
- Shorten all URLs: Shortens any lengthy URLs included in the variables.
- Set recurrence: Schedule SMS to be sent on specific days at a particular time.
Step 13: Once you have cross-checked all the details entered, click on “Send”.

Step 14: After clicking on “Send,” a pop-up box will appear, showing an overview of your message, including the number of invalid numbers, blacklisted numbers, SMS character counts, credits used, DND numbers, and duplicate numbers.

Once you verify the details, click on “Send Now“.
You have now successfully sent the SMS to your recipients.